Post by Mofo on Jan 27, 2014 23:05:27 GMT -7
Been a while since I posted an update. So... here's an update.
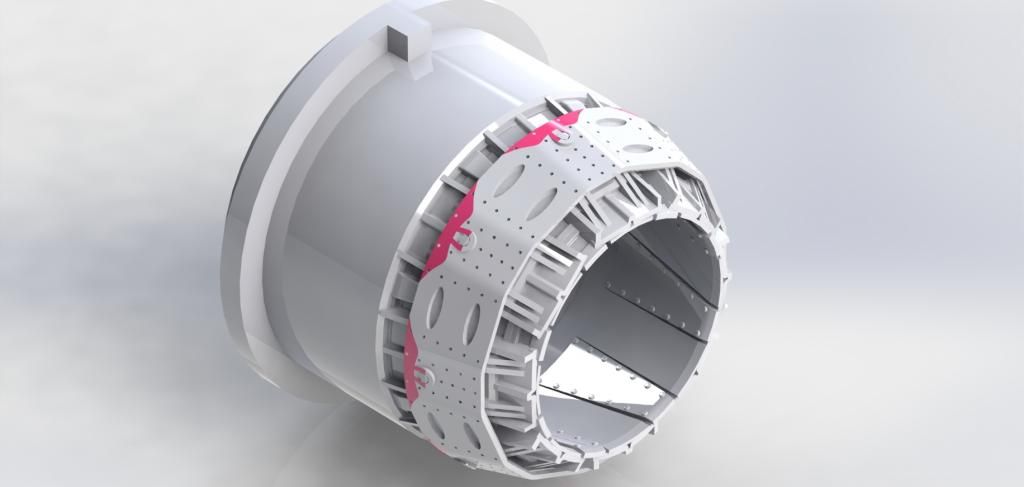
I've been pretty busy for the past couple of months. Bunch of irons in the fire, bunch of stuff finished. First up, done-done, exhausts for a 1/72 Lightning. The red areas have been shaved down to ensure an easy fit to the kit parts:
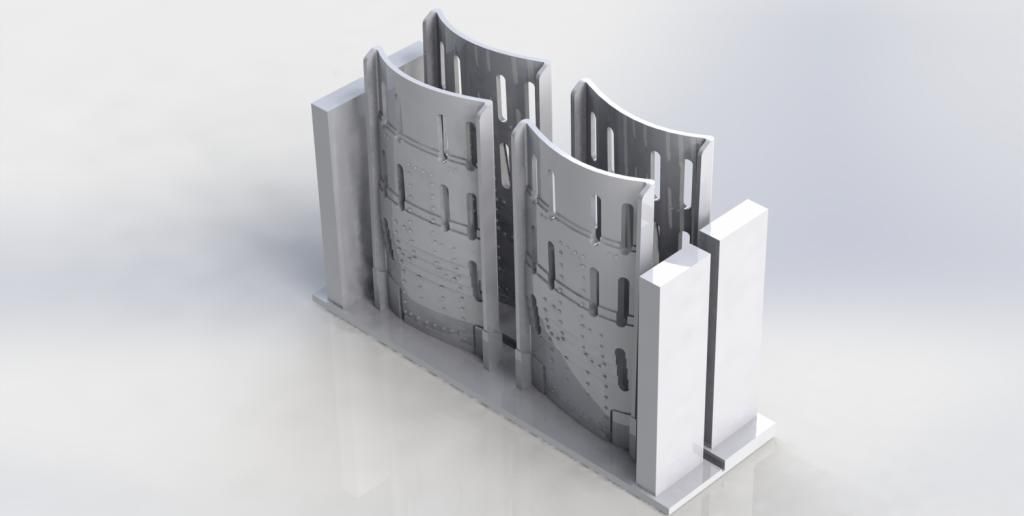
Plus some accurate airbrakes for the Kinetic T-45:
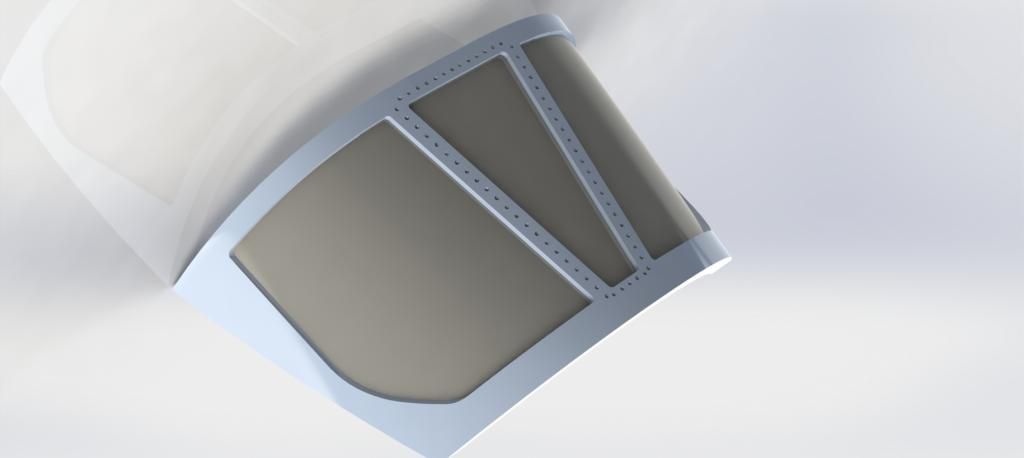
I've also done a replacement windscreen for the Trumpeter Tu-22 - they muffed the contours and proportions, plus this will have accurate rivet detail. I've had a test print made so I can check the fit, make sure it's a drop-in replacement before doing a "proper" print. It's in the mail as I type.
Sticking with the Backfire, the kit has all the control surfaces positionable... except the flaps. So (also ready for a test-print)...

And the big one: Landing gear. Learned a lot about landing gear doing these. I have some *awesome* references, and spending that much time studying the various components gave a decent understanding of how the real things function. And, the fact that the kit parts would be completely NON functional. They've got hinges, they've got oleos. But the oleos aren't connected to hinges, so they'd actually be completely immobile. Not to mention, the retraction arms pretty much just dangle in mid-air.
Anyway, mains are fully done:
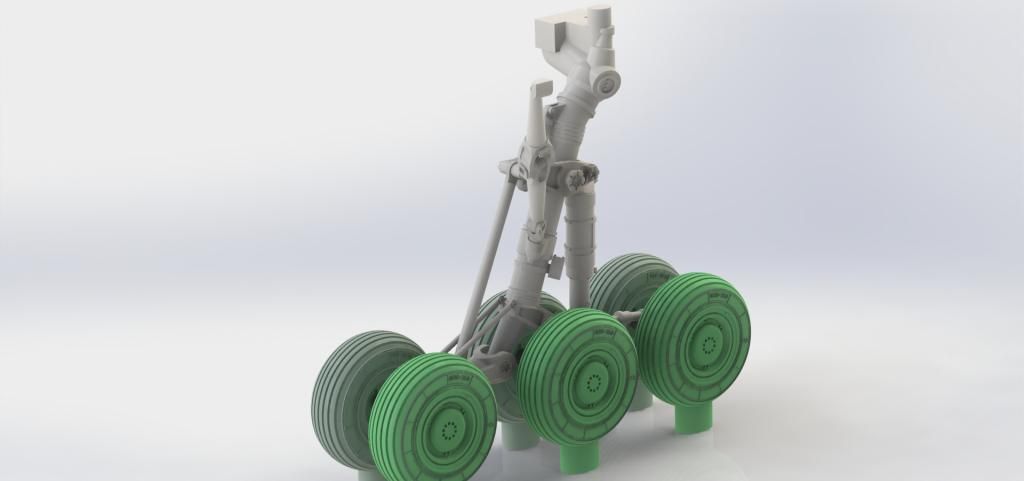
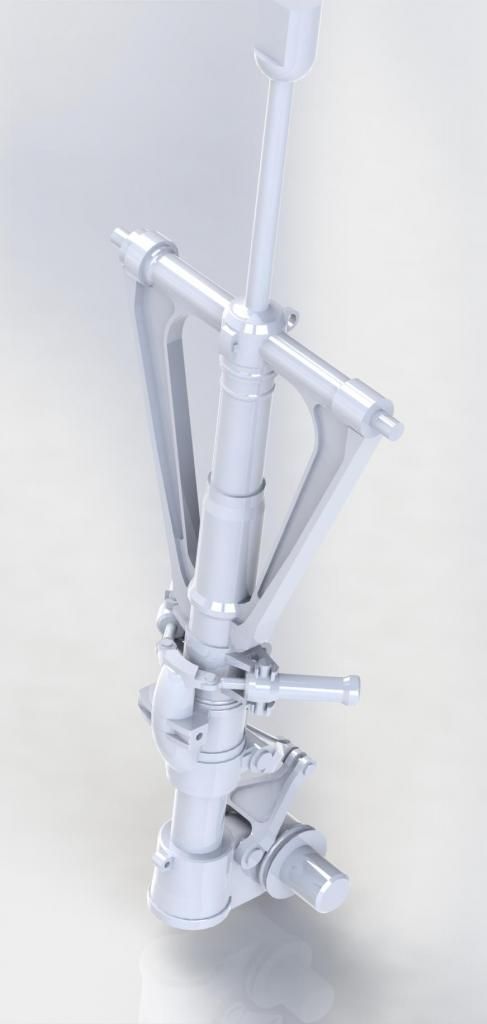
Nose gear is in progress. Getting pretty close, mostly down to details and the retraction struts now. The rod sticking out the top is a compromise: Trumpeter screwed the the NLG connection up; the real thing connects via those pins on the triangular buttresses out the sides, but Trumpeter have a long strut that plugs into the NLG bay roof. The long rod will set the correct depth, so you can drill out the walls for the mounting pins. Alternatively, you can leave the rod in place, it'll offer a bit more support, but it's visually less obtrusive.
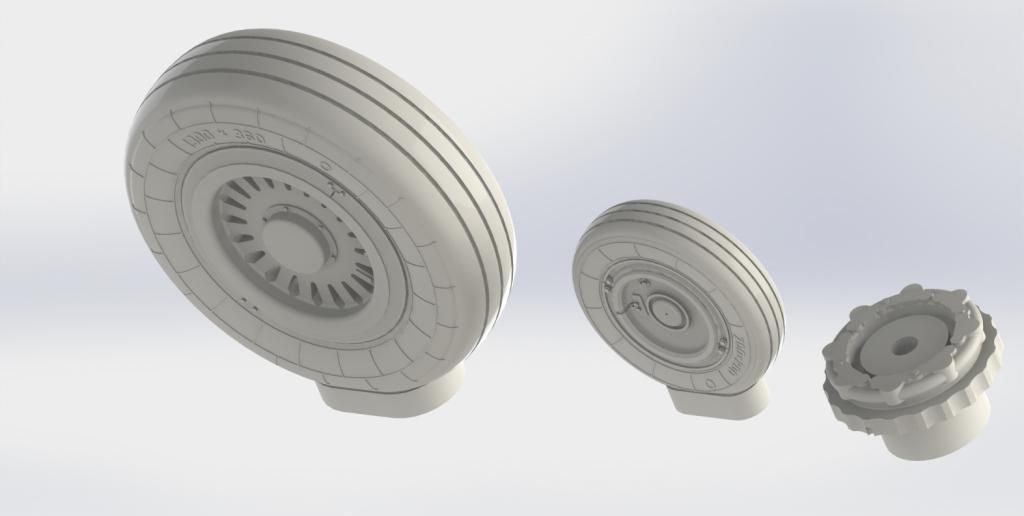
Back to done-done, the MiG-25 wheels are buttoned up and off to print. Pretty pleased with these.
So now I'm slogging through a bunch of fixes for the Kittyhawk Foxbat. It is shit. The parts look nice. The fit isn't great. It broadly looks like a Foxbat, but pretty much everything is wrong once you start studying the details. It's made me realize that subtle shape issues can often ripple out to bigger flaws. Two examples.
1. The kit took flak because the forward fuselage cross section is too boxy. It's flat on all four sides, with rounded corners. It SHOULD be fully round on top and bottom, just with flat sides. No big deal, right? Except they've carried that allllll the way through the radome, to the tip of the nose. The radome isn't round, it's a squircle. And you can't just give it a replacement radome, because that inaccurate cross section goes all the way back through the forward fuselage. To fix the radome, you need to fix the entire forward fuselage.
2. The intakes. KH decided the MiG-25 should have MiG-29 style, FOD-blanking intake ramps. It doesn't. Simple fix, right? Just glue the intake ramps at a more realistic angle. Except, KH contoured the intake ramps to the shape of the intake halves, which follow the shape of the fuselage sking. This is wrong. The MiG-25 intakes are actually boxed in - the front half is a rectangular tube. The difference? It's one of those "this would never work on a real plane" things. A boxed in, rectangular intake means the intake ramp moves cleanly up and down, regulating the flow of air. In KH's universe, if the ramps go up, you'd get massive gaps around the edges, which would create vortexes and shockwaves that would kill an engine. Simple fix? Well it'd be easy to add some sheet stock to box in the intake sides... except then you'd have to trim down the intake ramps. Which have PE detail. Which are sized to the (inaccurate) kit part.
I was working on some FOD covers briefly on the weekend, until I realized, because of this, even just a simple FOD cover would require the cover, a set of revised intakes, and an intake wall. And then the question, if I am doing a resin set, do I make it accurate, but more complicated and fiddly to install, or do I make it easy to install, but inaccurate? Grrr....
And THEN we get to the intakes. Assuming you don't want to just plug the gaping hole KH left. Except, I'm cartain they've fucked up the wheel well dimensions, which bulge into the intake trunks, which means I've got to massage the dimensions to make it work and not look completely inaccurate. Except I can't get any decent measurements off the kit, because it's so severely warped that I've got to tape it all together to hold it square.
Effing ridiculous.
Once I get the intakes done, it's on to the exhausts. Hopefully those will be less maddening to work on.
Ooooh, and I almost forgot. On a more personal note... I'm finally getting off my duff and getting these on the go:

I've also had a cunning idea of what I can do for buckles v.2.0
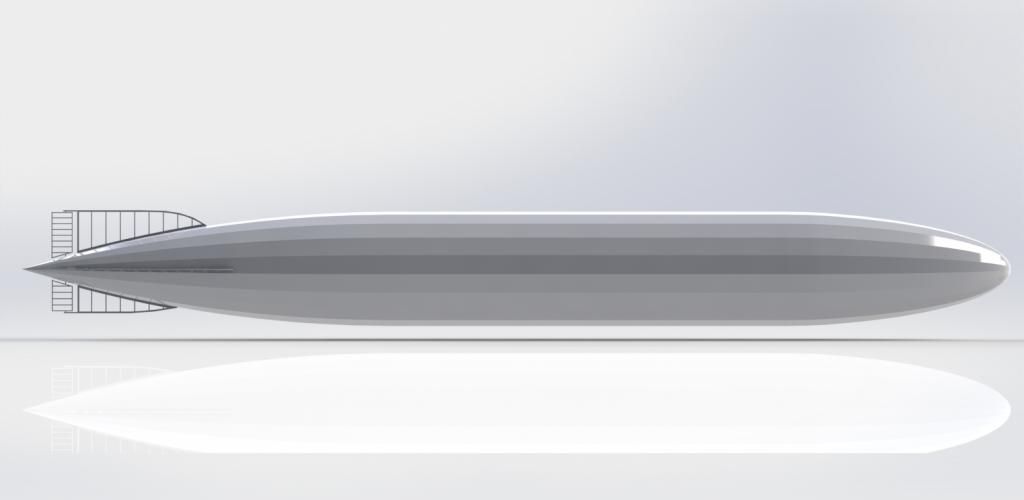
...aaaand this. It's not going to be 3D printed, but I'm hoping to do some laser cutting for it. Plotted all the parts out in CAD. One of my many mega projects I'm hoping to pull off this year.
I've been pretty busy for the past couple of months. Bunch of irons in the fire, bunch of stuff finished. First up, done-done, exhausts for a 1/72 Lightning. The red areas have been shaved down to ensure an easy fit to the kit parts:

Plus some accurate airbrakes for the Kinetic T-45:

I've also done a replacement windscreen for the Trumpeter Tu-22 - they muffed the contours and proportions, plus this will have accurate rivet detail. I've had a test print made so I can check the fit, make sure it's a drop-in replacement before doing a "proper" print. It's in the mail as I type.

Sticking with the Backfire, the kit has all the control surfaces positionable... except the flaps. So (also ready for a test-print)...

And the big one: Landing gear. Learned a lot about landing gear doing these. I have some *awesome* references, and spending that much time studying the various components gave a decent understanding of how the real things function. And, the fact that the kit parts would be completely NON functional. They've got hinges, they've got oleos. But the oleos aren't connected to hinges, so they'd actually be completely immobile. Not to mention, the retraction arms pretty much just dangle in mid-air.
Anyway, mains are fully done:

Nose gear is in progress. Getting pretty close, mostly down to details and the retraction struts now. The rod sticking out the top is a compromise: Trumpeter screwed the the NLG connection up; the real thing connects via those pins on the triangular buttresses out the sides, but Trumpeter have a long strut that plugs into the NLG bay roof. The long rod will set the correct depth, so you can drill out the walls for the mounting pins. Alternatively, you can leave the rod in place, it'll offer a bit more support, but it's visually less obtrusive.

Back to done-done, the MiG-25 wheels are buttoned up and off to print. Pretty pleased with these.

So now I'm slogging through a bunch of fixes for the Kittyhawk Foxbat. It is shit. The parts look nice. The fit isn't great. It broadly looks like a Foxbat, but pretty much everything is wrong once you start studying the details. It's made me realize that subtle shape issues can often ripple out to bigger flaws. Two examples.
1. The kit took flak because the forward fuselage cross section is too boxy. It's flat on all four sides, with rounded corners. It SHOULD be fully round on top and bottom, just with flat sides. No big deal, right? Except they've carried that allllll the way through the radome, to the tip of the nose. The radome isn't round, it's a squircle. And you can't just give it a replacement radome, because that inaccurate cross section goes all the way back through the forward fuselage. To fix the radome, you need to fix the entire forward fuselage.
2. The intakes. KH decided the MiG-25 should have MiG-29 style, FOD-blanking intake ramps. It doesn't. Simple fix, right? Just glue the intake ramps at a more realistic angle. Except, KH contoured the intake ramps to the shape of the intake halves, which follow the shape of the fuselage sking. This is wrong. The MiG-25 intakes are actually boxed in - the front half is a rectangular tube. The difference? It's one of those "this would never work on a real plane" things. A boxed in, rectangular intake means the intake ramp moves cleanly up and down, regulating the flow of air. In KH's universe, if the ramps go up, you'd get massive gaps around the edges, which would create vortexes and shockwaves that would kill an engine. Simple fix? Well it'd be easy to add some sheet stock to box in the intake sides... except then you'd have to trim down the intake ramps. Which have PE detail. Which are sized to the (inaccurate) kit part.
I was working on some FOD covers briefly on the weekend, until I realized, because of this, even just a simple FOD cover would require the cover, a set of revised intakes, and an intake wall. And then the question, if I am doing a resin set, do I make it accurate, but more complicated and fiddly to install, or do I make it easy to install, but inaccurate? Grrr....
And THEN we get to the intakes. Assuming you don't want to just plug the gaping hole KH left. Except, I'm cartain they've fucked up the wheel well dimensions, which bulge into the intake trunks, which means I've got to massage the dimensions to make it work and not look completely inaccurate. Except I can't get any decent measurements off the kit, because it's so severely warped that I've got to tape it all together to hold it square.
Effing ridiculous.
Once I get the intakes done, it's on to the exhausts. Hopefully those will be less maddening to work on.
Ooooh, and I almost forgot. On a more personal note... I'm finally getting off my duff and getting these on the go:

I've also had a cunning idea of what I can do for buckles v.2.0
...aaaand this. It's not going to be 3D printed, but I'm hoping to do some laser cutting for it. Plotted all the parts out in CAD. One of my many mega projects I'm hoping to pull off this year.


