|
|
Post by Mofo on May 31, 2015 19:22:41 GMT -7
Minor update. The scratched styrene tailplanes were getting battered a bit from handling (it's hard to be really delicate with the tail when you're busily sanding four feet away...), so I decided to re-do them in brass. Re-printed the tailplane skeleton templates, bent and trimmed some brass square rod to shape, then soldered all the bits together: 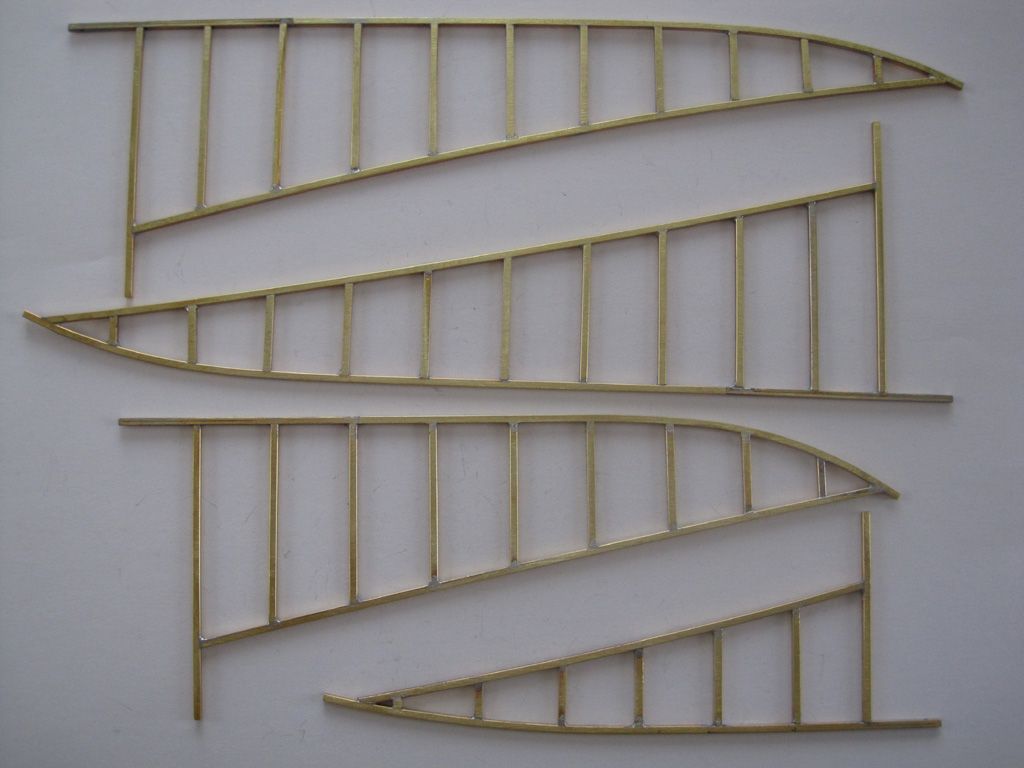 I'd post in-progress photos, but there's not really all that much to show. Tons of tedious measuring, cutting and filing, but nothing terribly interesting. Just imagine the before photos being of a straight rod, and the after photos showing slightly bent rods lined up with the templates, plus a whole bunch of short rods.  />/> The various bits and pieces were taped down to the templates to set the alignment, then a drop of flux and a couple of seconds under the soldering iron to secure everything. 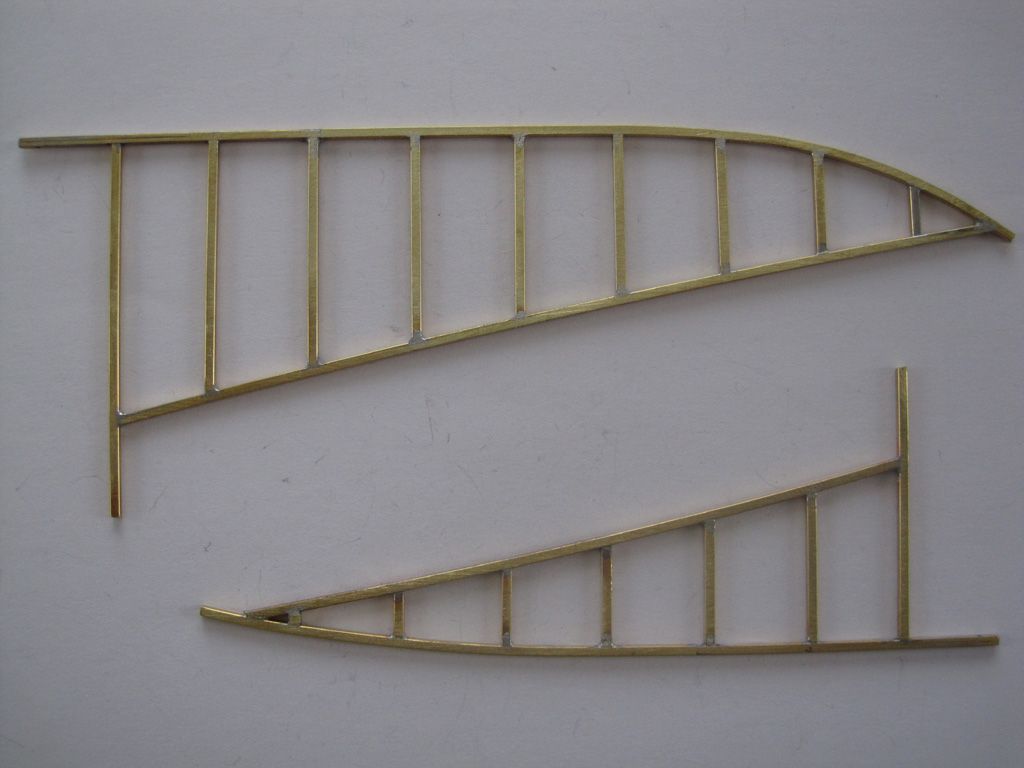 Next step will be to (re?) skin these in styrene sheet, cut the plastic tails off the Zepp and attach the brass replacements. Note the extended lengths of rod towards the bottom/rear corner of the fins - these will get anchored into the spine, which should add a nice bit of rigidity to the whole assembly. Assuming I can drill the locating holes correctly... sort of feels like I'll be doing keyhole surgery! Interesting statistic, though: the four tailplane skeletons took just under eight feet of 1/16" brass square rod. |
|
|
|
Post by Mofo on May 31, 2015 19:22:59 GMT -7
This month I have mostly been: sanding! Like, a sickening amount of sanding. Think it sucks having to putty, sand and feather in some ill-fitting, 1/2" 2 Landing gear door? How 'bout filling and sanding 671 square inches of long, straight, facets. I think I'm nearly done smoothing out the balloon. I actually came *this* close to binning the scratchbuilt part and just printing out the entire envelope, as I wasn't satisfied with the somewhat wavy seam lines. I wanted something crisp and geometrically perfect, and computers are much better at that than people. But, after many, many applications of putty and careful sanding to try to straighten the creases as much as possible, I'm finally at a point where I'm pretty much satisfied. Still not 100%, but it's pretty close. I'll shoot some pics of the putty-speckled mess ASAP - it's really not pretty at the moment. Hopefully I can get a coat of primer on this weekend, then it'll be ready to have the rib tapes tediously applied (some .7mm pinstriping tape), another coat of primer and then finally, *finally* ready for paint! Oh, and plus scribing the surface detail, and adding the tailplanes, and scratching some sort of brass tail tip so the resin part doesn't keep %$#@ing chipping, and, and, and...  /> Also: jeebus help me, I've just received a copy of the R-Classe Datafile and I'm already starting to goof around in CAD. Maybe my project for 2016? Eep!  /> And just so this post isn't *completely* devoid of pics, here's a quick comparison of the various Zeppelin Classes. Other than the Q Classe (which is the one I'm building), they're just rough sketches, but they're all properly scaled, if the shapes aren't 100%. 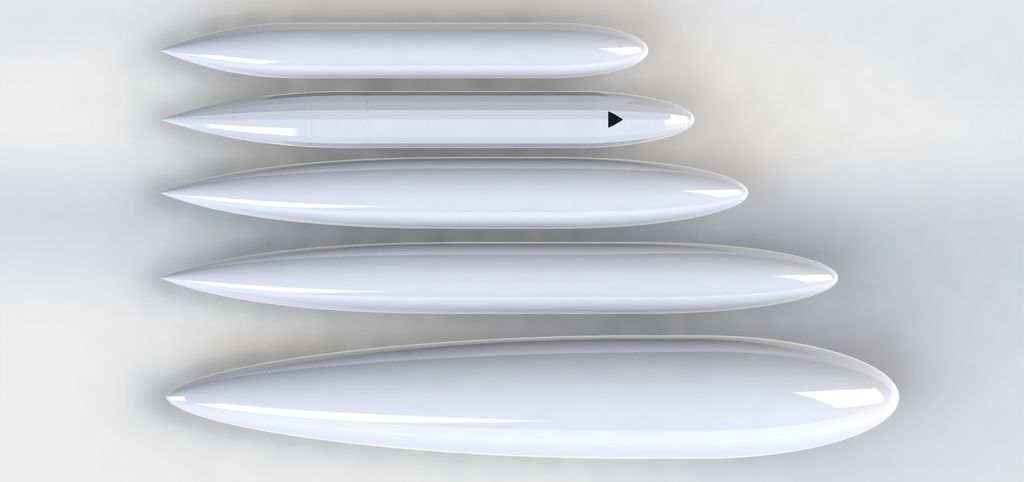 From top: M Classe, the relatively puny early war Zepp, more reconnaissance oriented than a bomber. Q Classe (subject of this build) R Classe (the first of the Super Zeppelins; bigger balloon for a higher service ceiling in an attempt to skim over British air defences) W Classe (the Afrika Shiff, designed to fly from Germany to Tanzania, to resupply troops) Hindenburg, just to show how truly massive the airships got. The Q Classe is huge in 1/144. I can't even imagine a Hindenburg! |
|
|
|
Post by Mofo on May 31, 2015 19:23:21 GMT -7
Finally had a sunny day (the zepp is a little big to squeeze into a photo booth), so as promised, more pics. I think I'm just about ready to lay down a final (I hope...) coat of primer, so the next major hurdle will be figuring out how to precisely locate the individual rib stations. I *had* planned to print out a template which I could simply lay along each skin panel, but after all the filling and sanding, the shape is a tiiiny bit out of whack. Unfortunately, a degree here and a mm there, over a four foot span, adds up to about a 3mm error overall.  /> So now I've got to figure out a plan B. First up, an overall view: 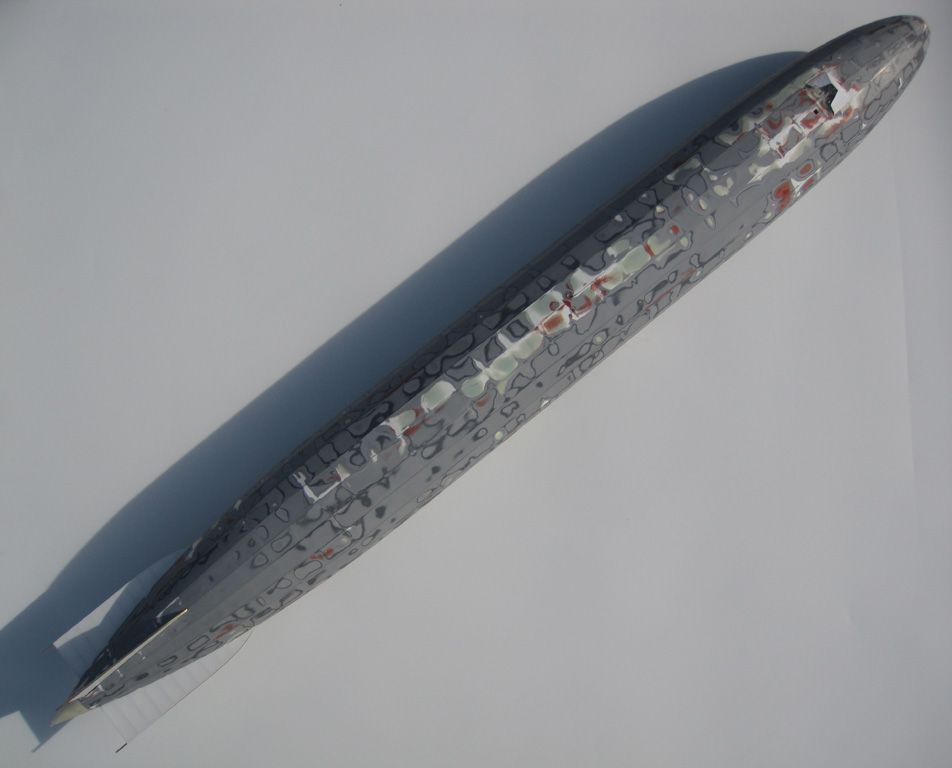 Zooming in, you can do some archaeology sorting out the various layers. Almost has a psychadelic vibe: 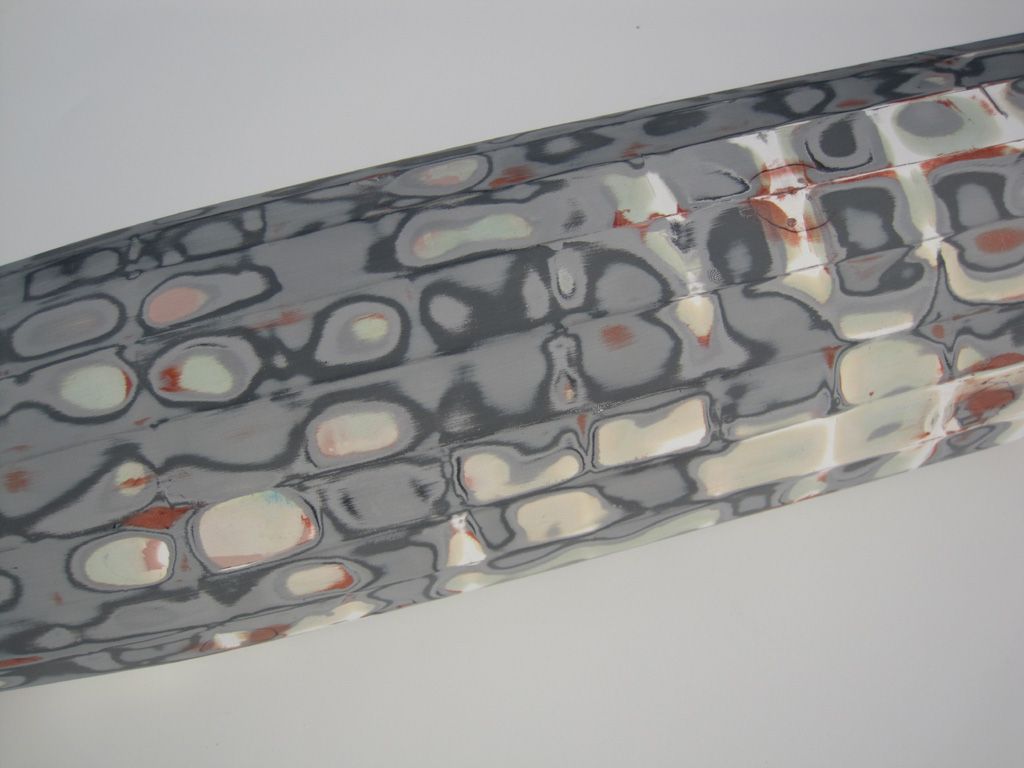 Tailplanes are done, but just test fitted. It'll take a bit of putty and sanding to blend these in, but hopefully nothing too serious... 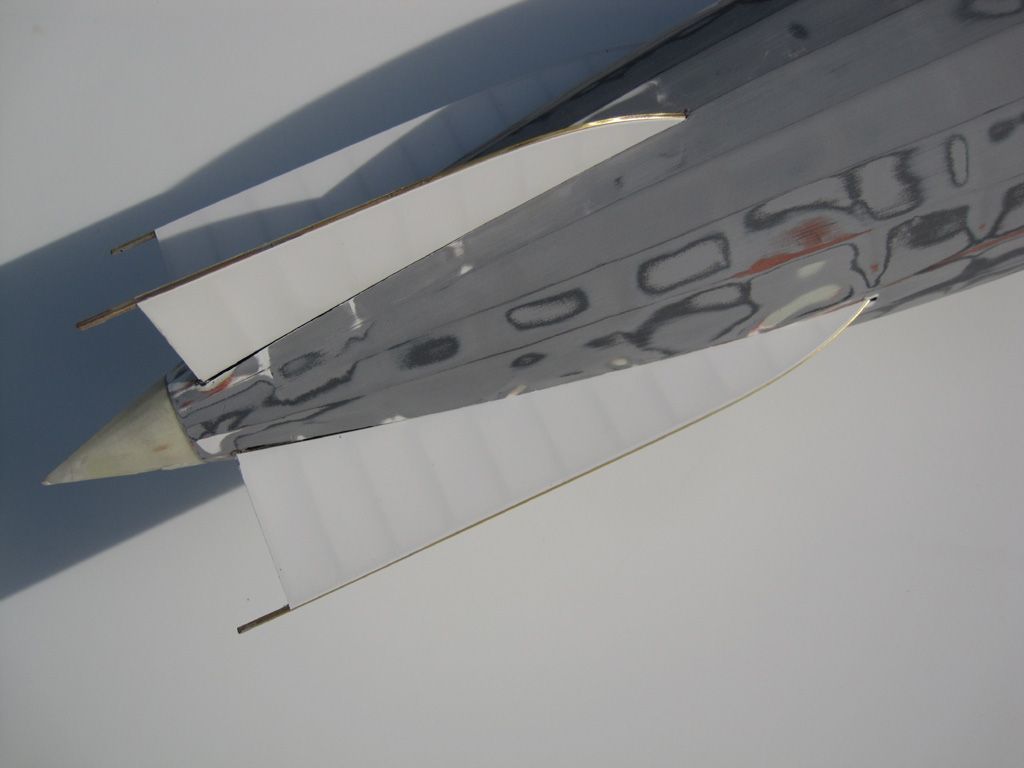 Gun platform has been fitted. It's actually *too* good a fit - it press fits snugly into place, so by the time I add a few layers of filler primer, primer and paint it'll probably be too big for the hole. Guess I'll need to do some careful filing (and masking) 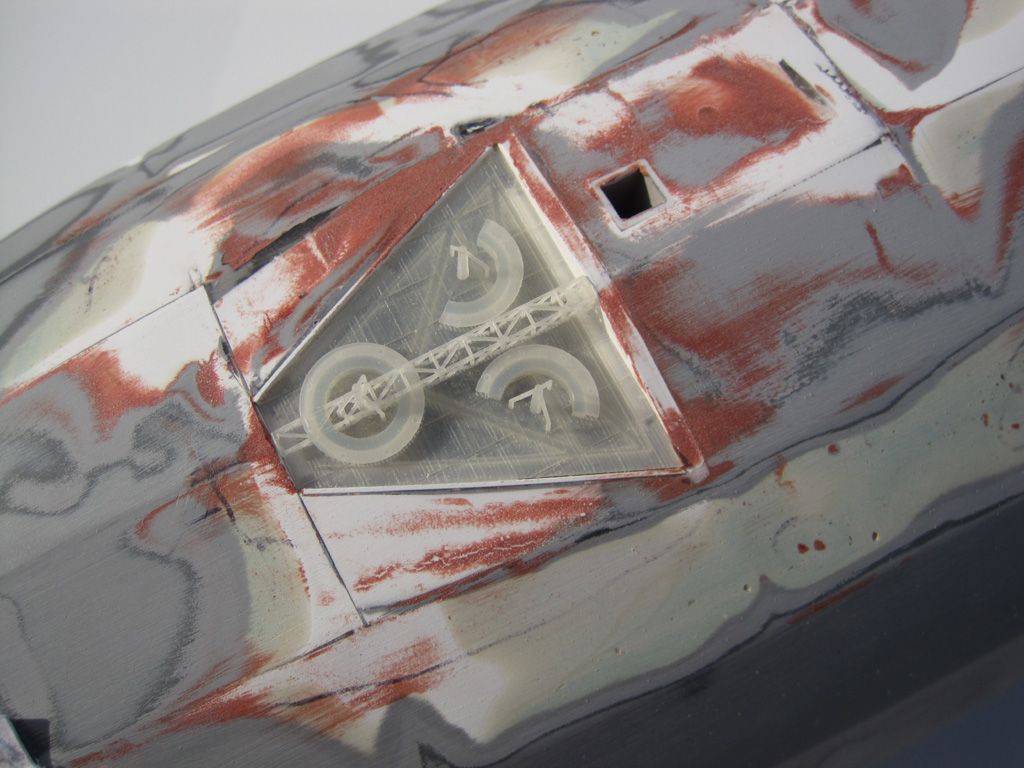 ...and as a teaser, while it's been raining the past few days, I finally caved in to the siren song of the R Classe schematics.  /> 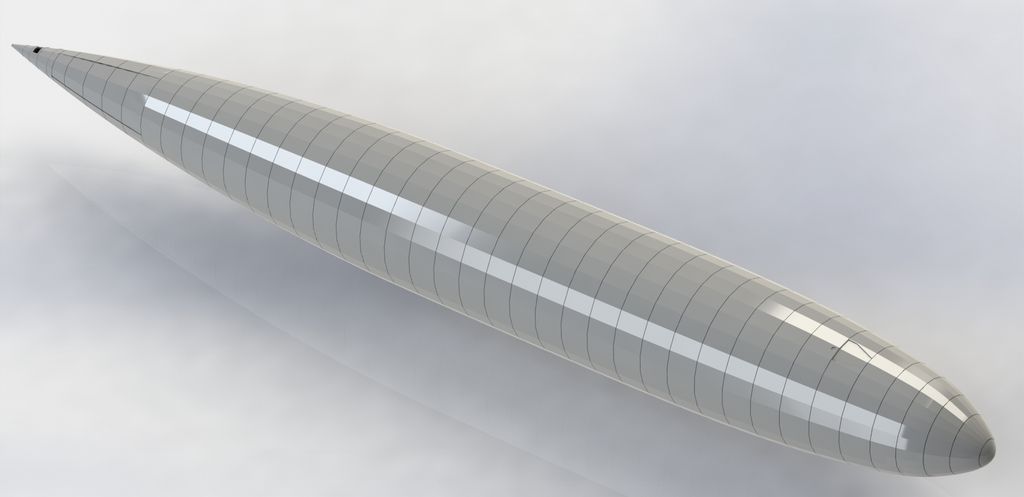 |
|
|
|
Post by KyrreI on Jun 18, 2015 15:04:52 GMT -7
Awesome job!
This could maybe have been done as a fibreglass kit.
(Crap keyboard and no logon)
|
|
|
|
Post by gnat on Oct 28, 2015 8:53:12 GMT -7
fantastic I had not checked in for a while...to busy. But keep going I really want to see this project finished its great.
David
|
|
|
|
Post by timmay on Jan 21, 2016 6:42:52 GMT -7
I admire your tenacity in staying with this awesome project. Really beautiful work. Timmay!
|
|